From Scratch
For comparison with another software for Galaxy tool development planemo, I am going to use an example from the planemo use cases. In this example we are going to use GTG to build this seqtk_seq_2.xml file.
In this guide, we’ll create each piece of the XML, step by step, and show what the resulting output XML would look like.
Note
There are many valid XML components in a Galaxy XML file. To learn more about each individual tool component, please read the Galaxy documentation.
Initialize an XML
- Click the Create Tool XML tab
- Enter
seqtk_seq_2.xmlinto XML file name - Leave Tool description blank for the tutorial
- Select From scratch and click Save
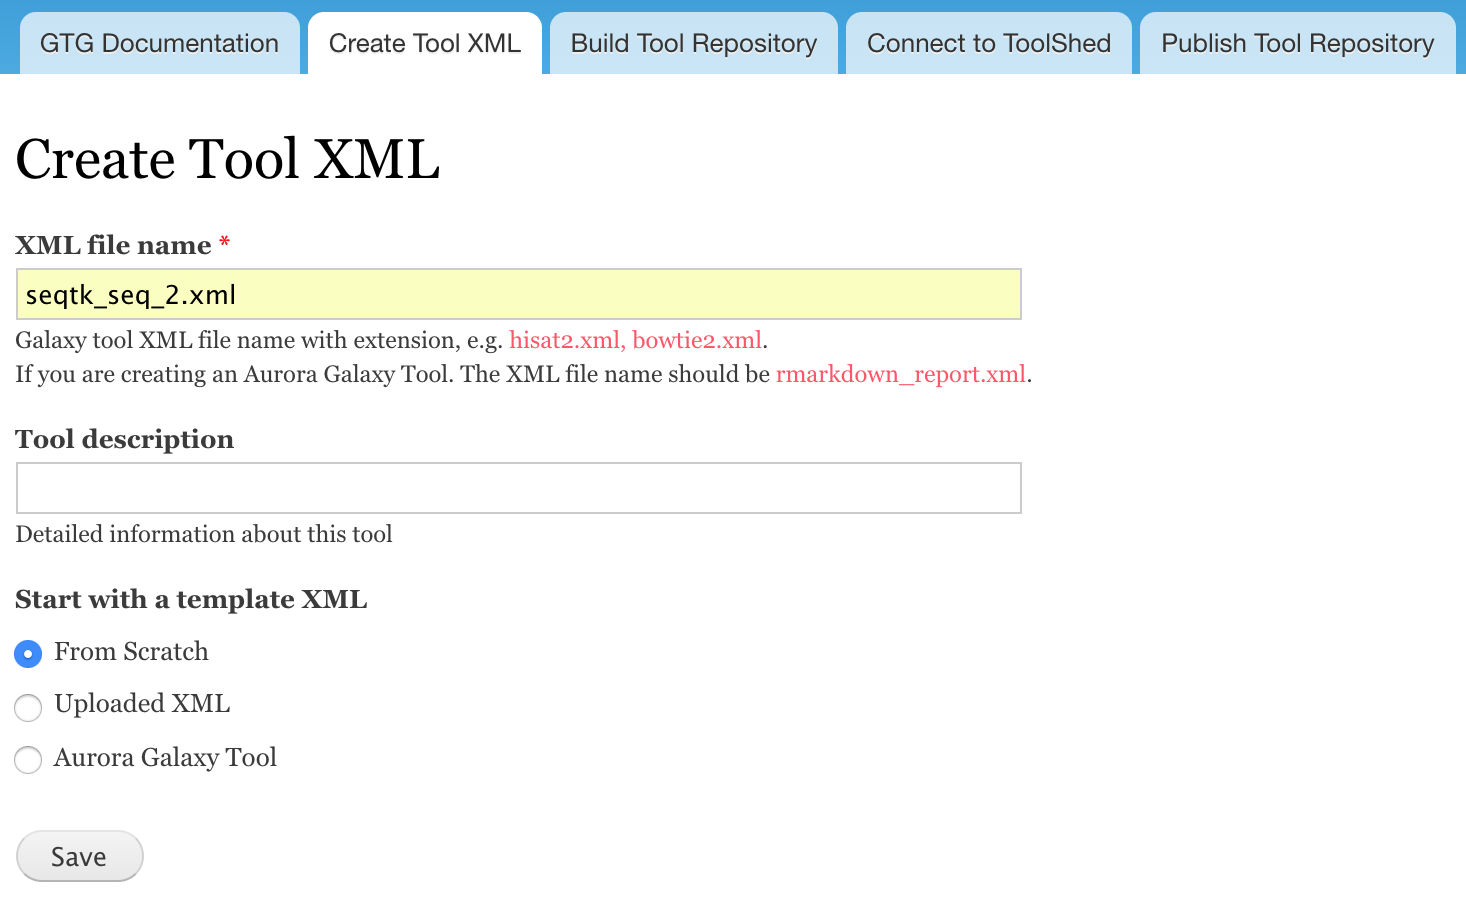
If successful, you will see the message: “The new webform seqtk_seq_2.xml has been created. Add new fields to your webform with the form below.”
Build The Tool Components
After you create the XML file, the XML interface will be open. To reach it again, click the Build Tool Repository tab, and click edit for your tool.
1. Create the root tool component

Fill out the following values for the tool root:
| Field Label | Value |
|---|---|
| Tool ID | seqtk_seq |
| Name | Convert to FASTA (seqtk) |
| Version | 0.1.0 |
Leave the other fields blank, and click Save.
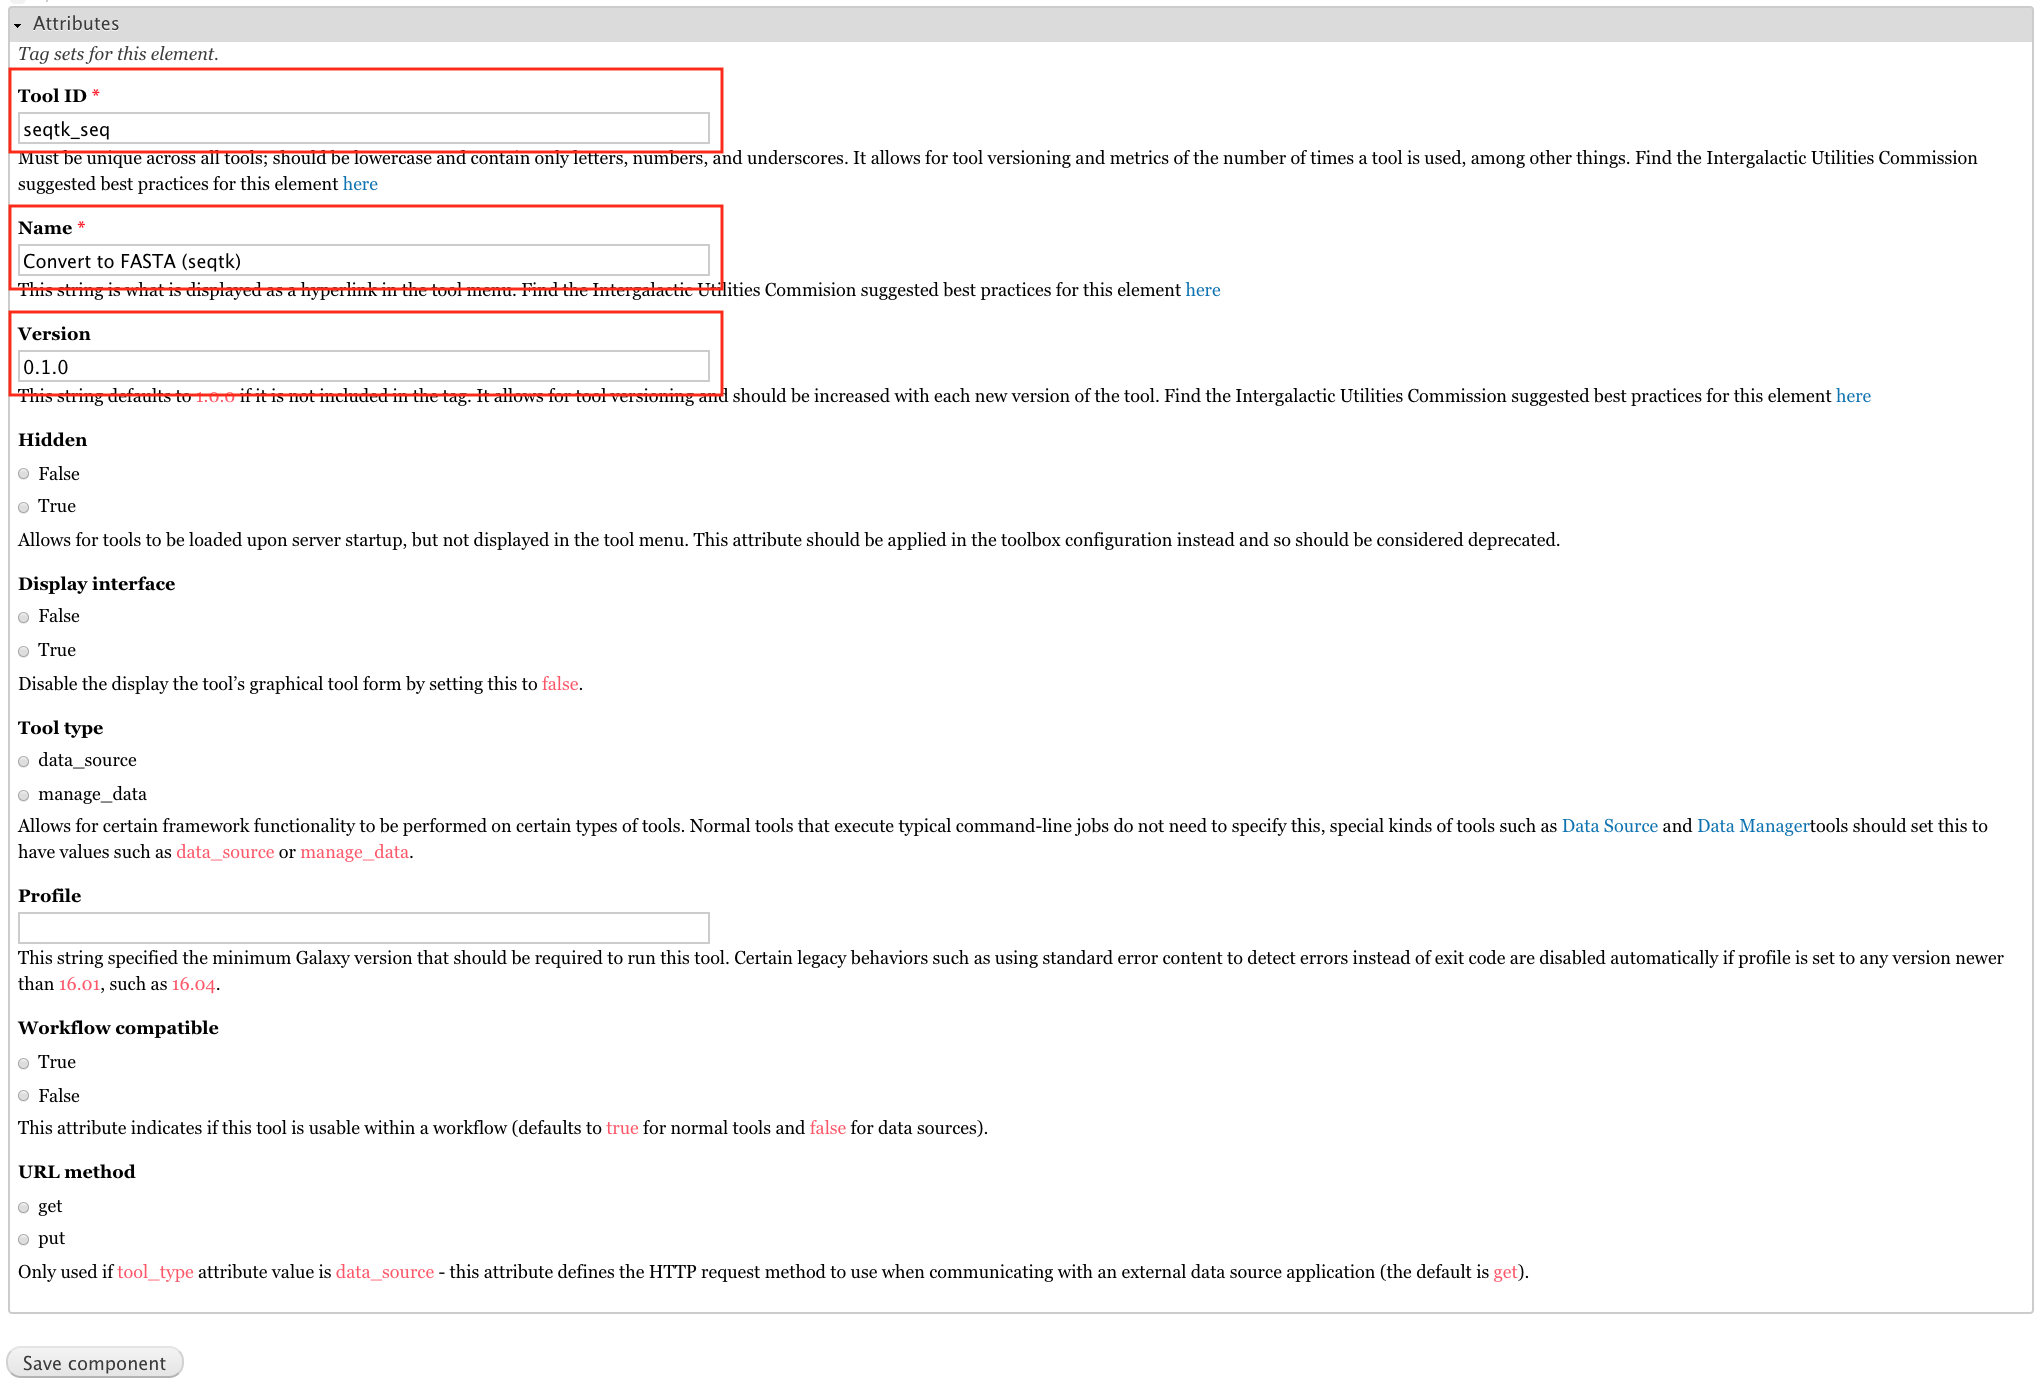
The resulting XML element looks like this:
<tool id="seqtk_seq" name="Convert to FASTA (seqtk)" version="0.1.0">
2. Define the tool’s requirements
Add tool->requirements component
The component tool->requirements is a subcomponent of the component tool, it needs to be placed under tool. You can drag a component to arrange its location. All subcomponents needs to be correctly placed under their parent components.

Set the label to requirements and choose tool->requirements from the select box under Operations.
This component does not have any attributes, so just click Save Component. This is because the requirements parent is just a list individual requirements: let’s define one next.

Next we’ll build our actual requirement component. Name it seqtk, and select tool->requirements->requirement for the Operation.

Fill out the following values for the requirements attribute:
| Field Label | Value |
|---|---|
| Type | package |
| Version | 1.2 |
| Package name | seqtk |
Edit tool->requirements->requirement component attributes.
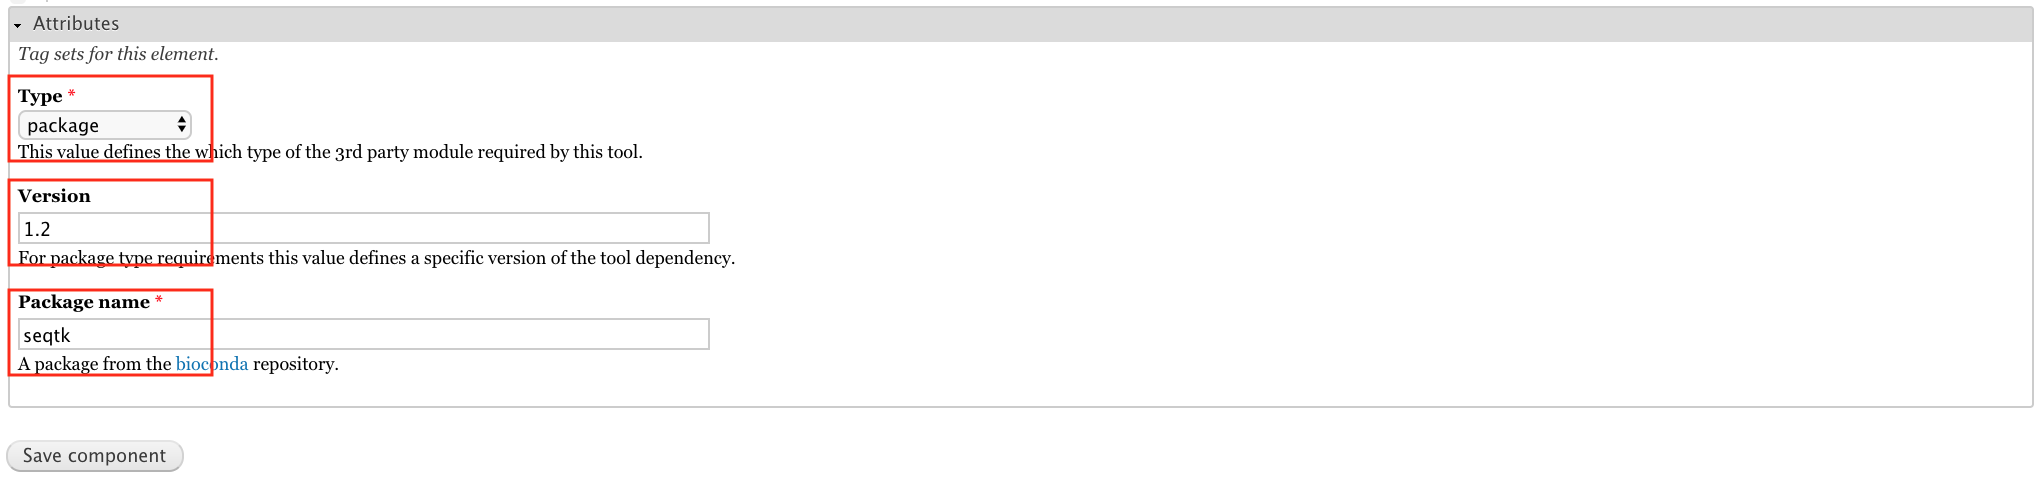
We’ve just added the below XML to our tool.
<requirements>
        <requirement type="package" version="1.2">seqtk</requirement>
</requirements>
3. Create tool->command component
Next, we will add the below XML block.
<command detect_errors="exit_code"><![CDATA[
    seqtk seq -a '$input1' > '$output1'
]]></command>
Add a component labeled command and select tool->command for the type.

Enter the below attributes for this component:
| Field Label | Value |
|---|---|
| Detect errors | exit_code |
| XML value | seqtk seq -a '$input1 > $output1' |
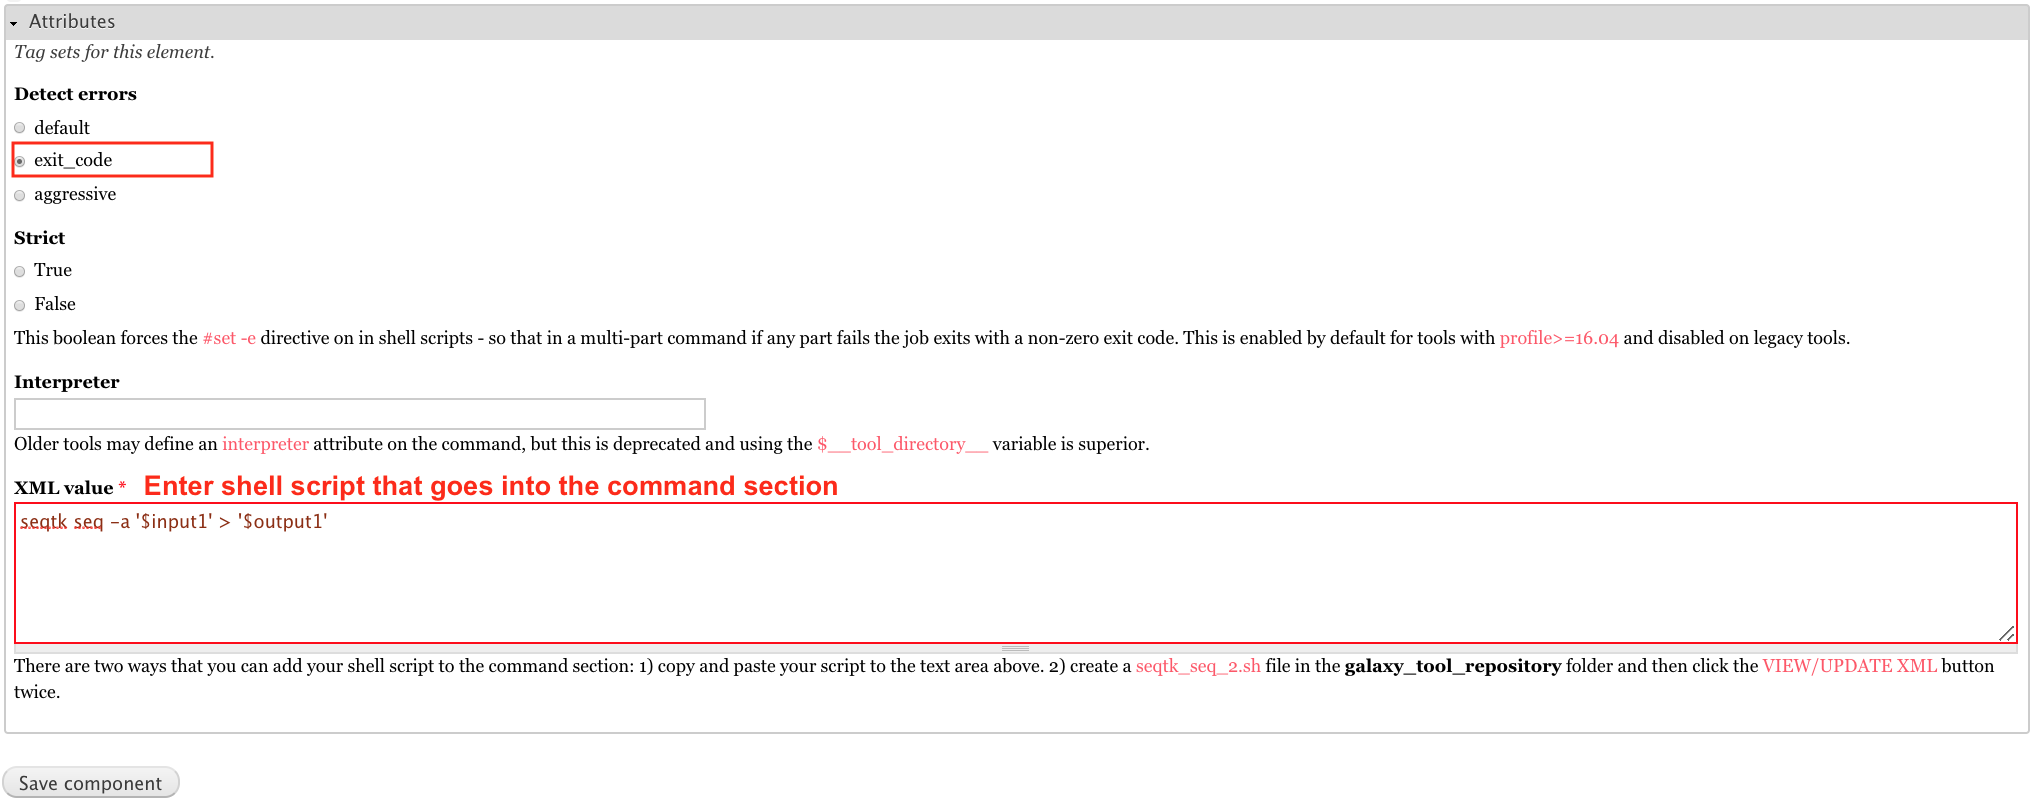
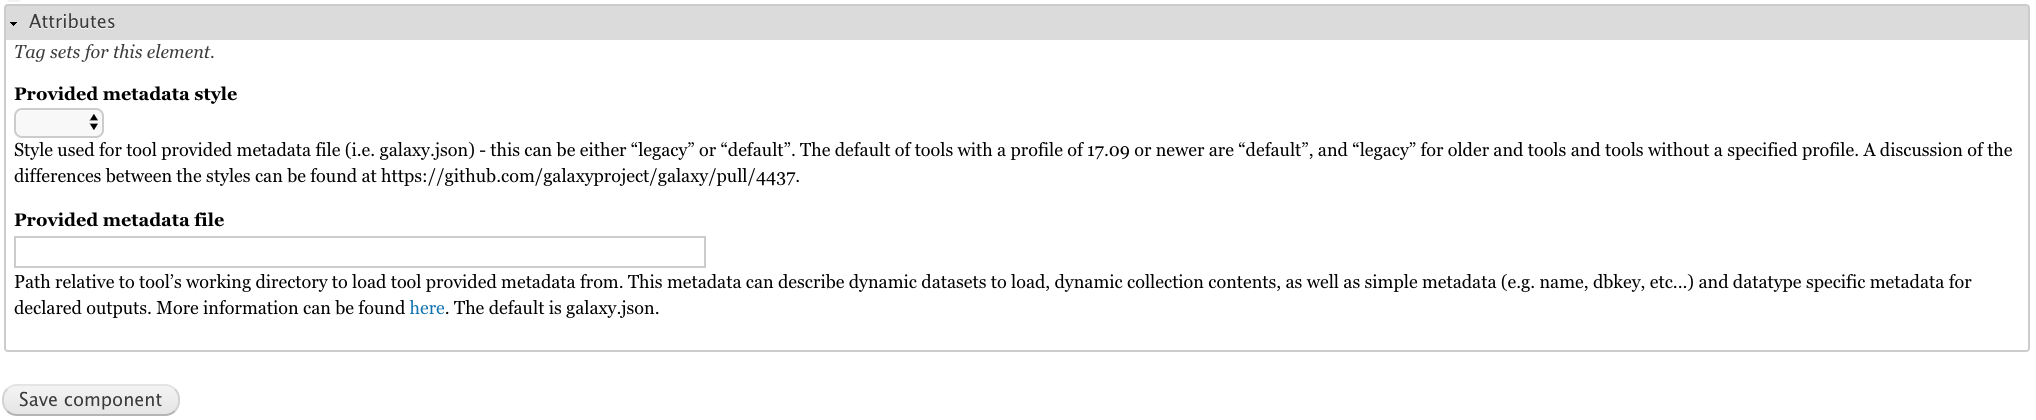
The XML value field in the above web form is used to collect the shell script for the command section. However,
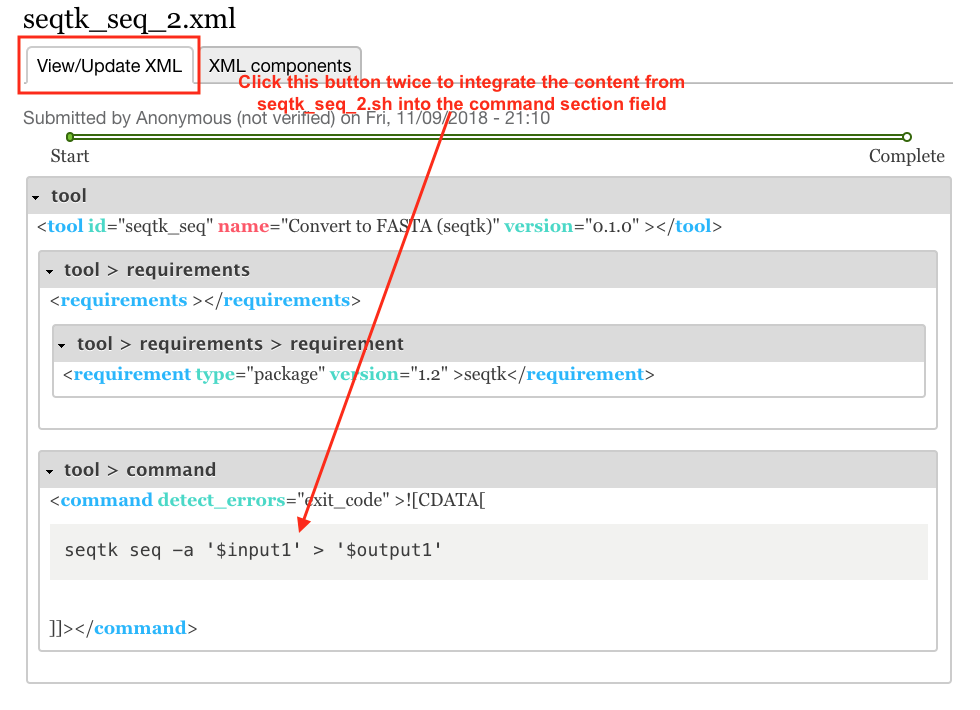
there is an easier way to input a shell script into the tool XML file. Go to the gtg_dev_dir/galaxy_tool_repository and create
a .sh file. Put the shell script into this file, and the contents will be automatically integrated into the web form field when the XML webform page is being viewed (see the image below). The .sh file should have exactly the same base name as the XML file. In this example, the XML file is seqtk_seq_2.xml, so the .sh file should be seqtk_seq_2.sh.
4. Create tool->inputs component
Net, we will add inputs, resulting in the following XML.
  <inputs>
    <param type="data" name="input1" format="fastq" />
</inputs>
Create a component labeled inputs, choosing the tool->inputs type.

In this example, we don’t need to edit any attributes for this component, so submit the attributes form blank.

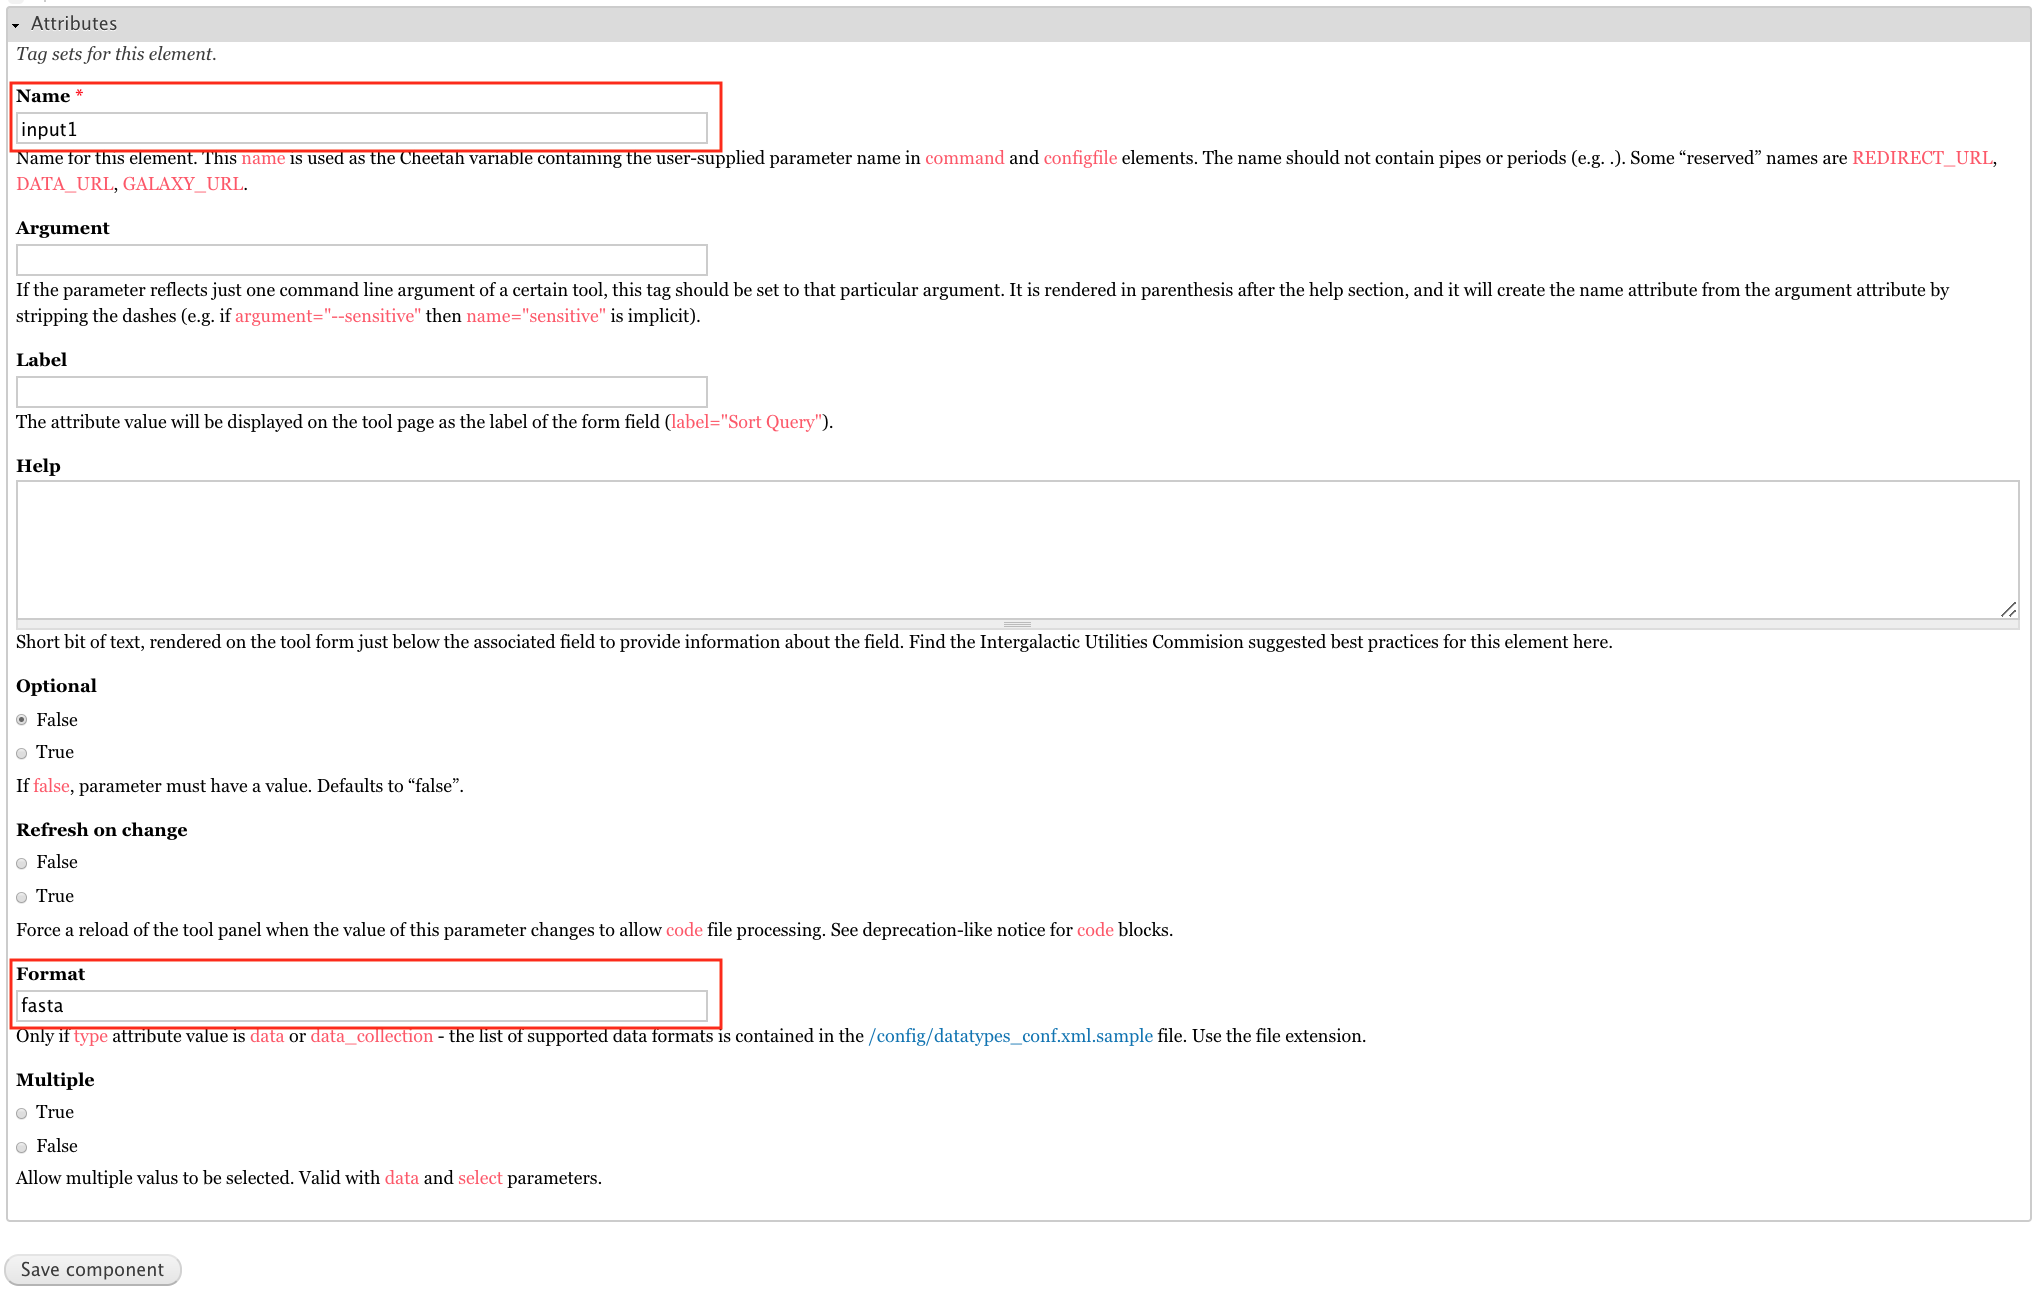
Next, add a component labeled input_data, selecting the tool->inputs->param(type: data) component type.

| Field Label | Value |
|---|---|
| Name | input1 |
| Format | fasta |
5. Create tool->outputs component
Next, we’ll add the below XML.
<outputs>
    <data name="output1" format="fasta" />
</outputs>
Add a component labeled outputs, of type tool->outputs.
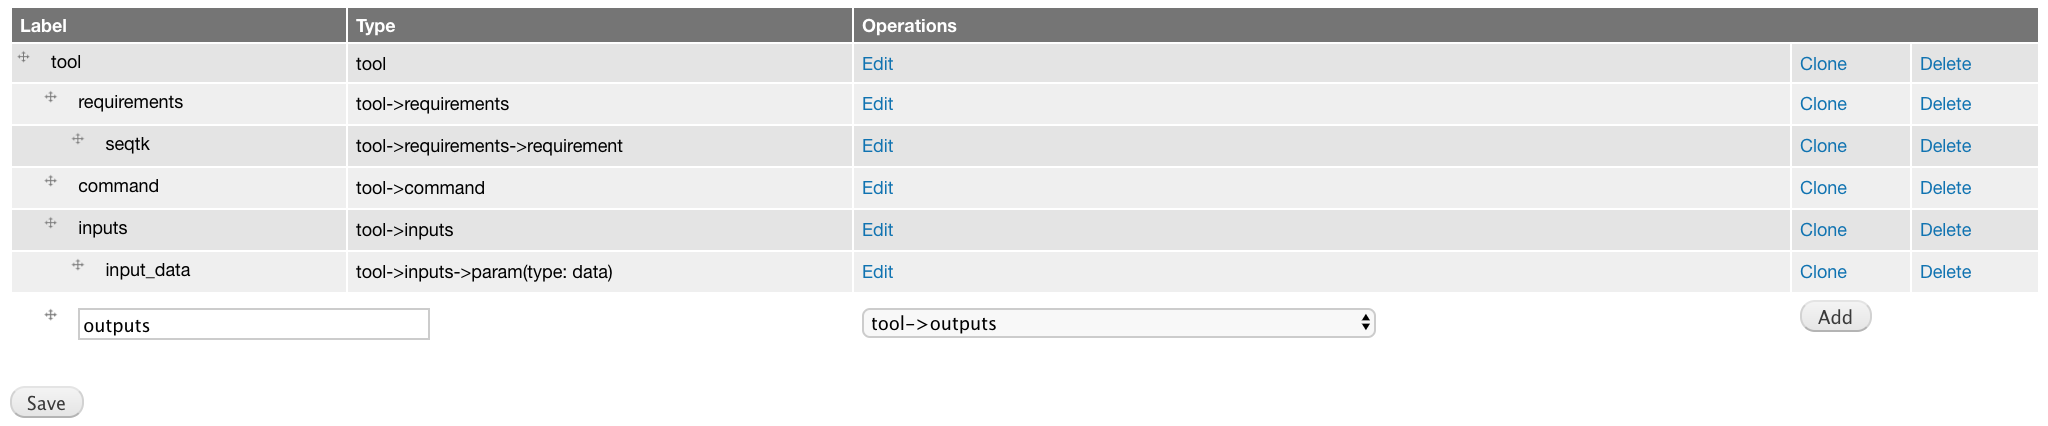
Leave the attributes blank for this component.
6. Create tool->tests component
Next well create a tests component, which looks like this in XML:
  <tests>
    <test>
        <param name="input1" value="2.fastq"/>
        <output name="output1" file="2.fasta"/>
    </test>
</tests>
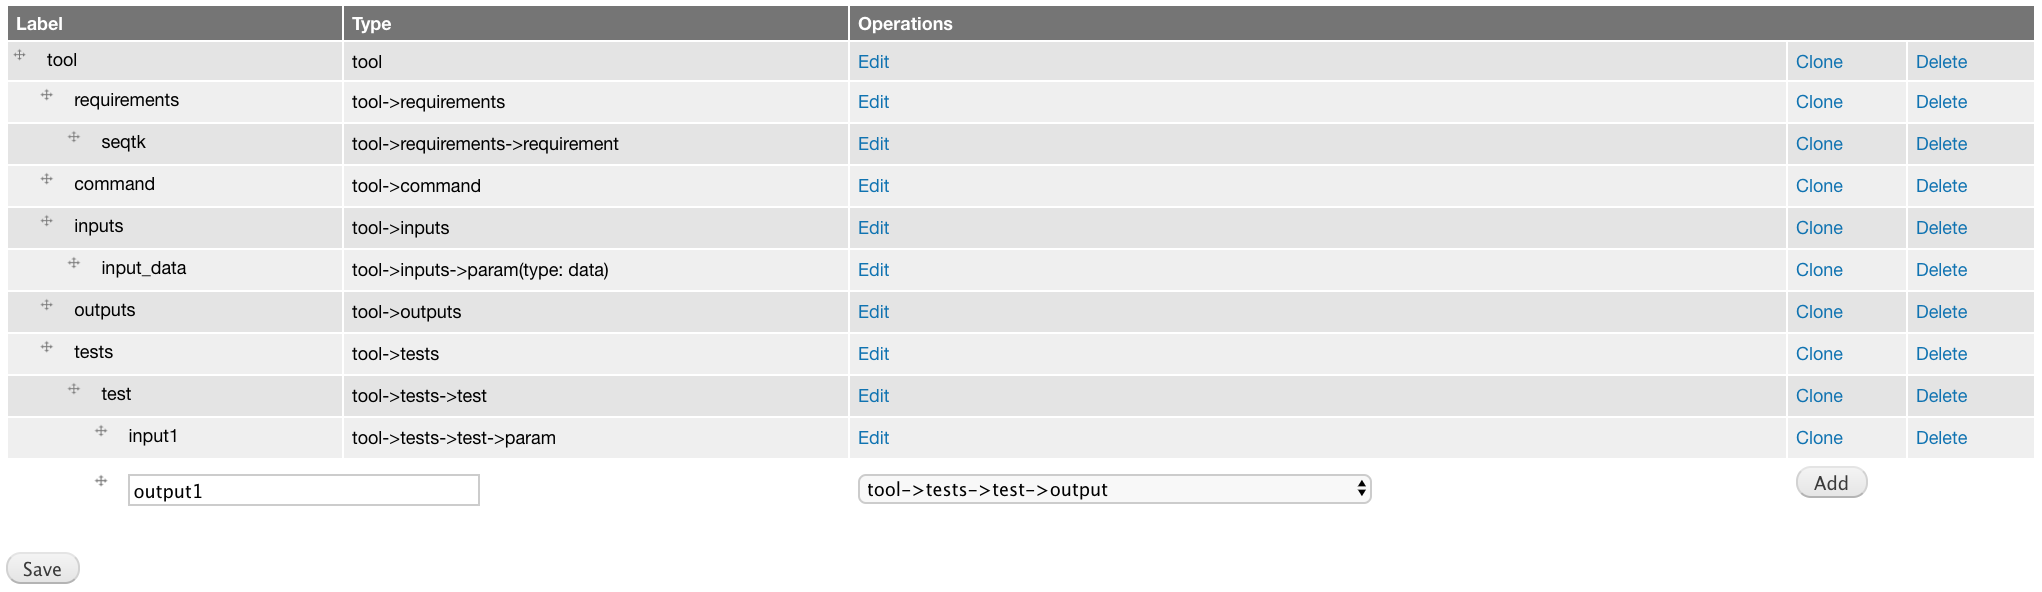
Add a tests component of the tool->tests component type.
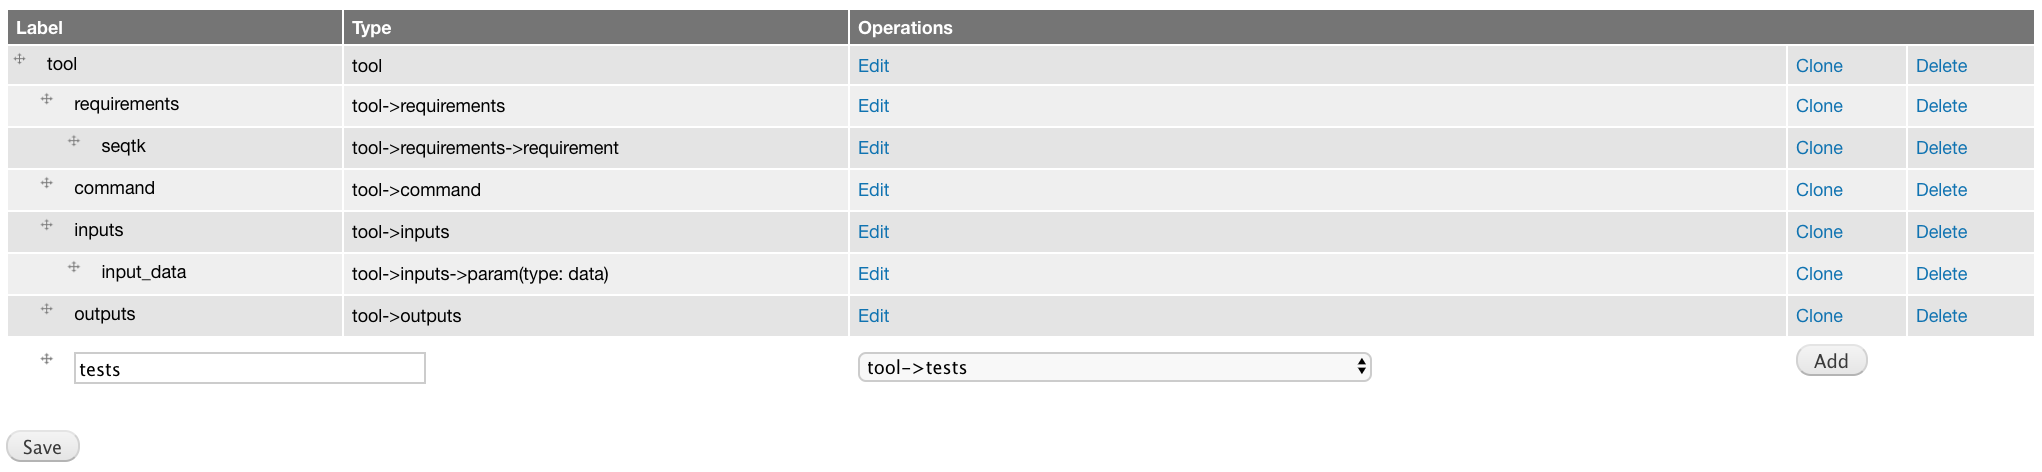
There are no attributes to choose.

Add a test component of the tool->tests->test component type
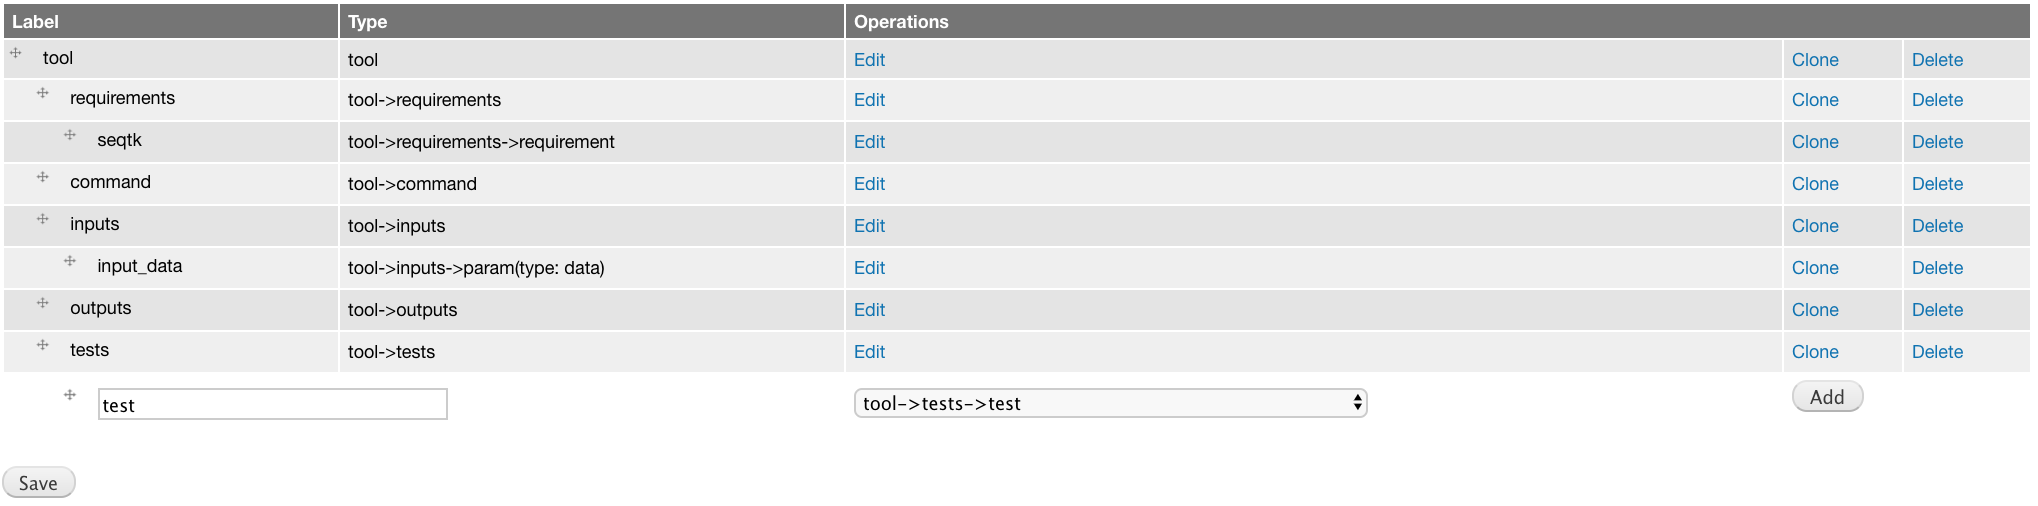
Again, there are no attributes to choose.

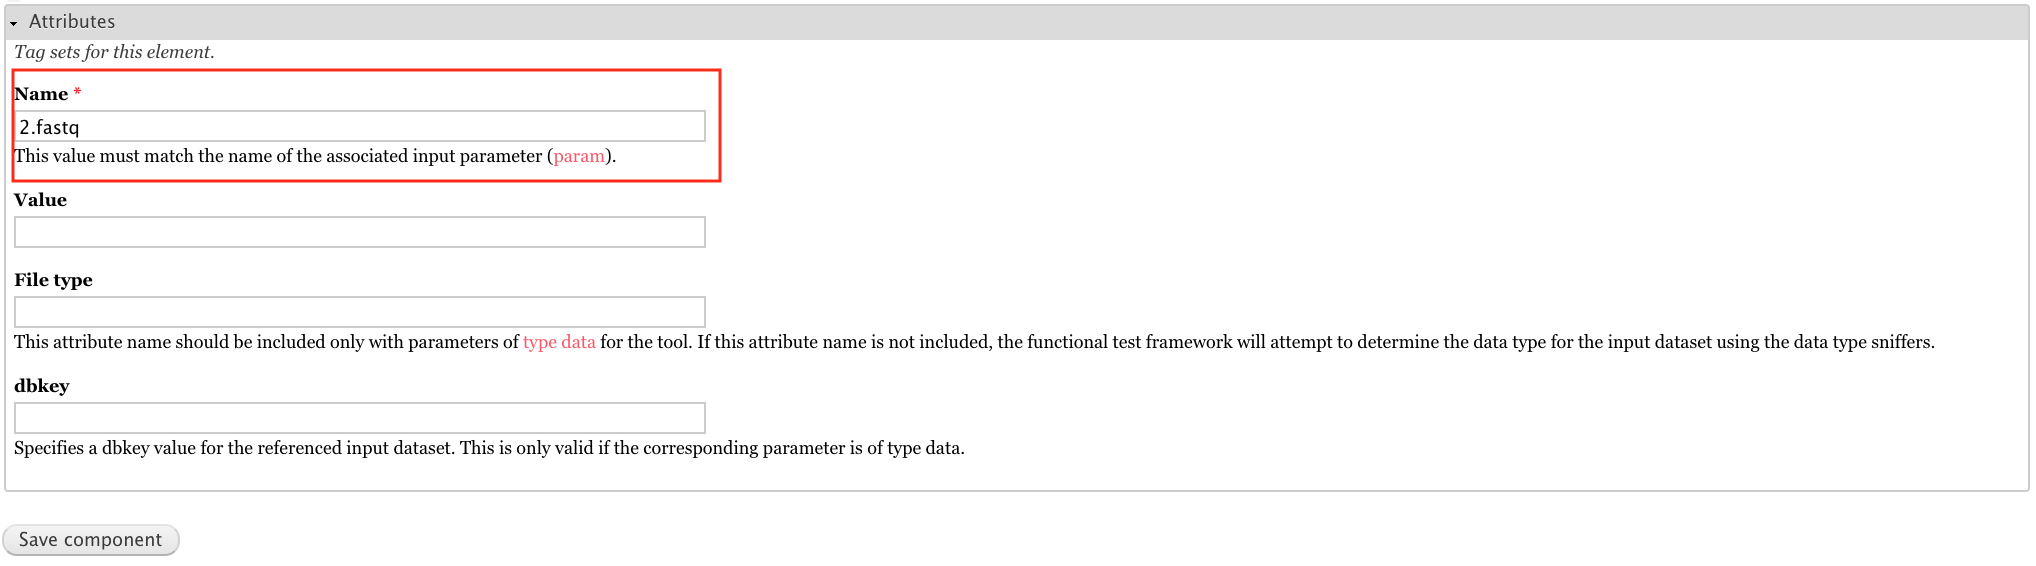
Add a tool->tests->test->param component labeled input1.
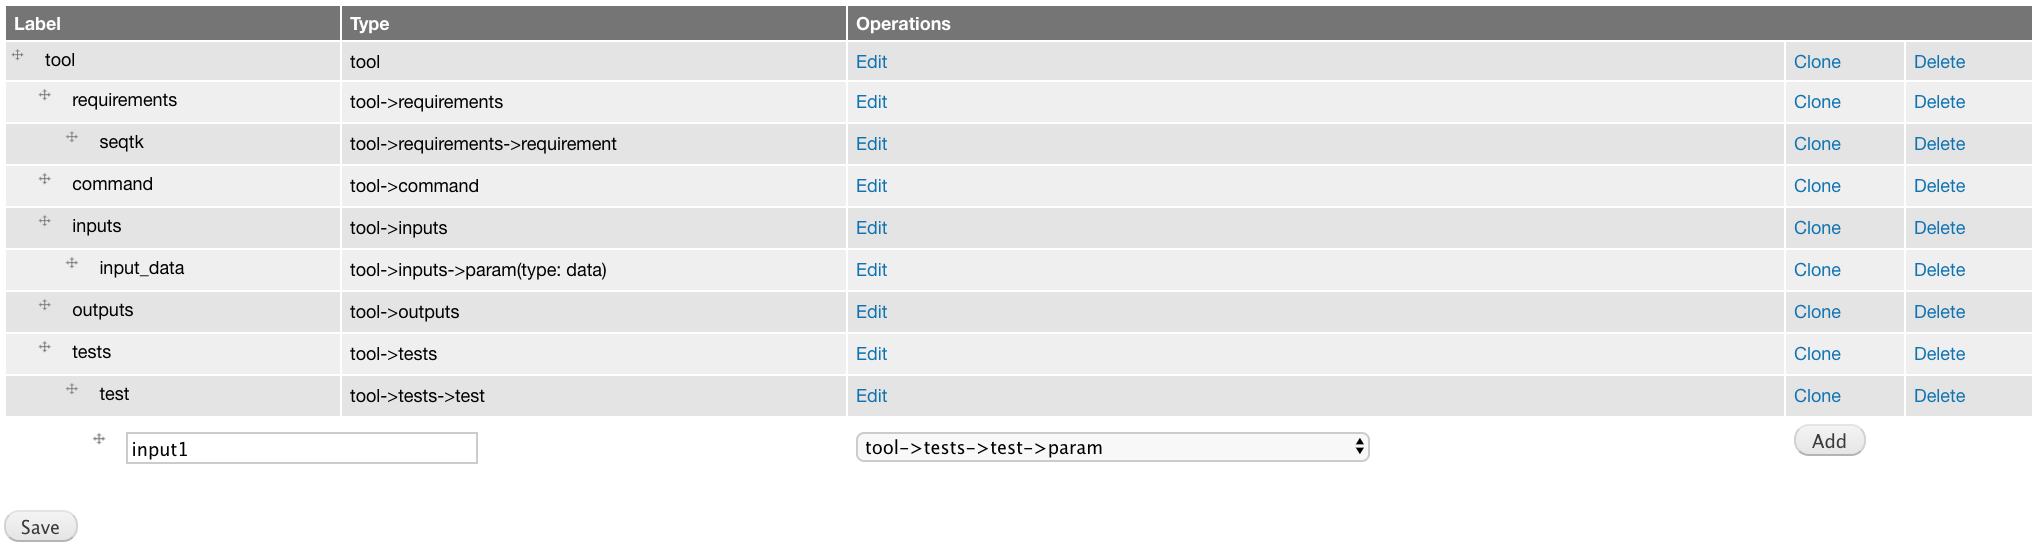
For the attributes, set Name to 2.fastq.
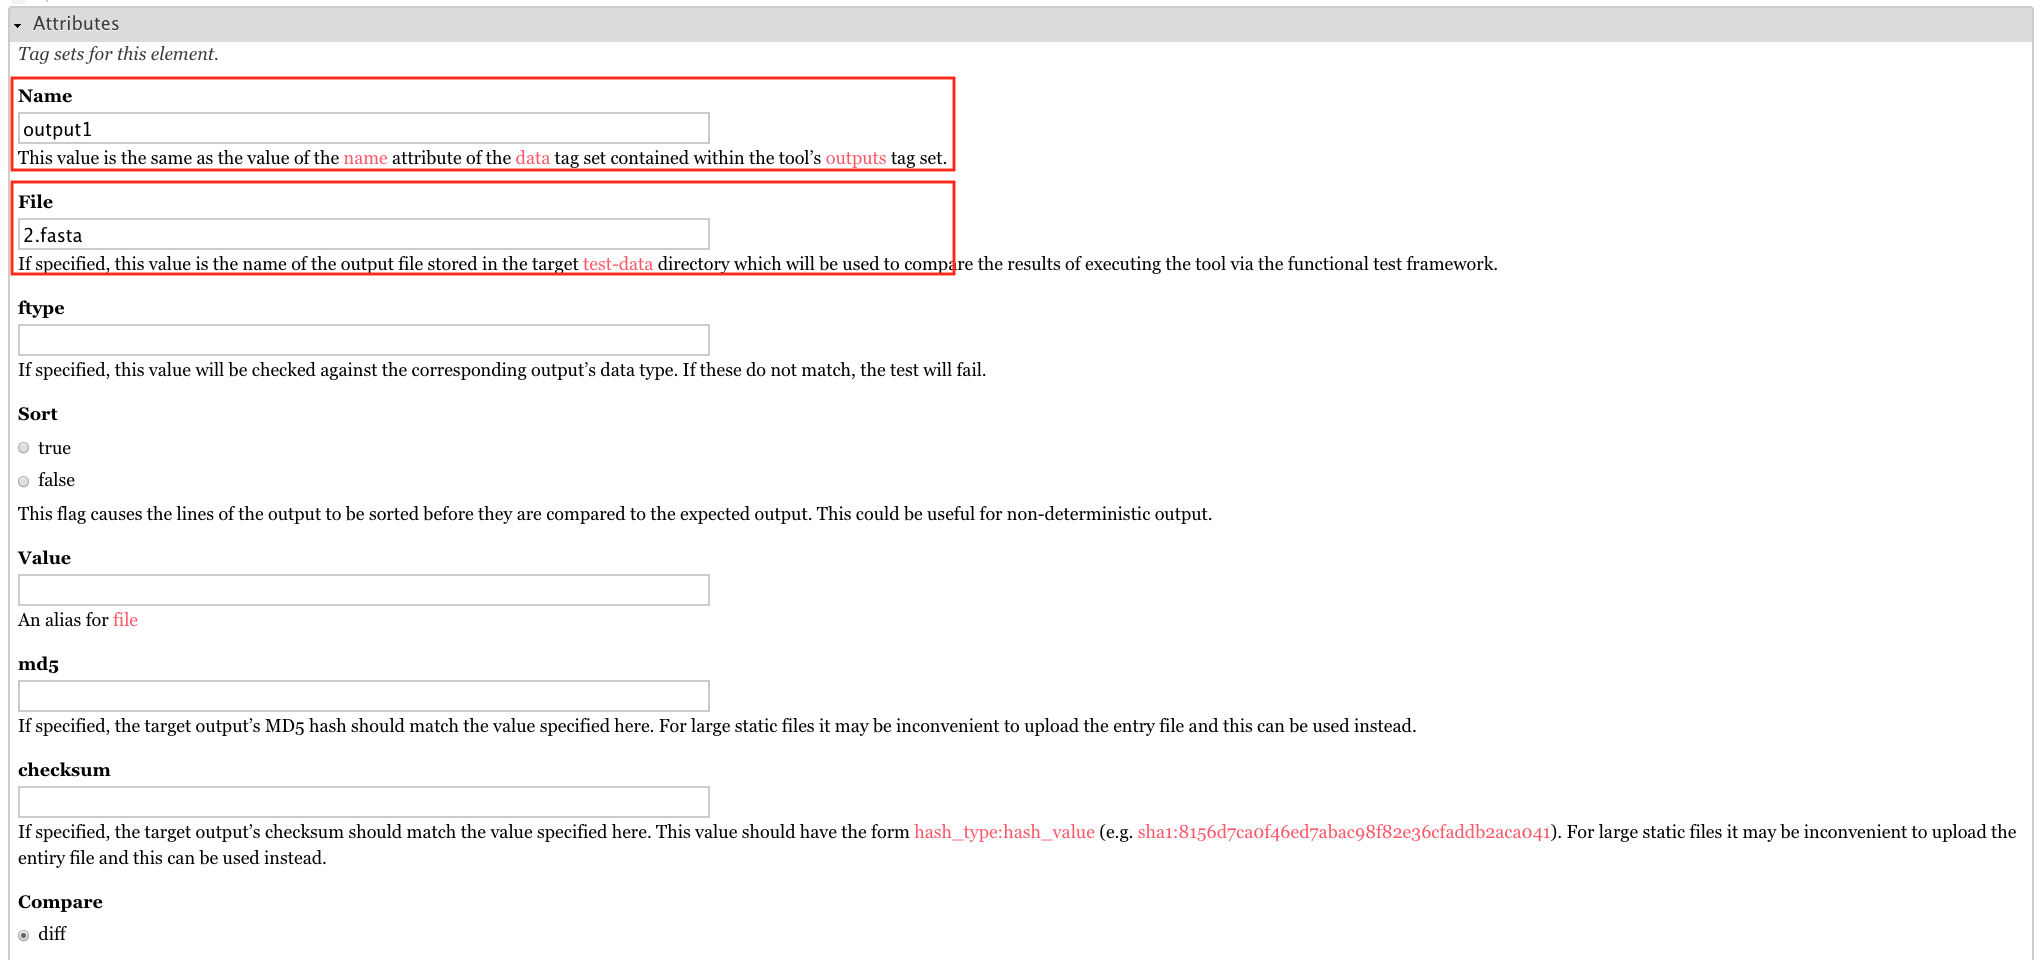
Add a tool->tests->test-output component labeled output1.
For the attributes, set Name to output1 and File to 2.fasta
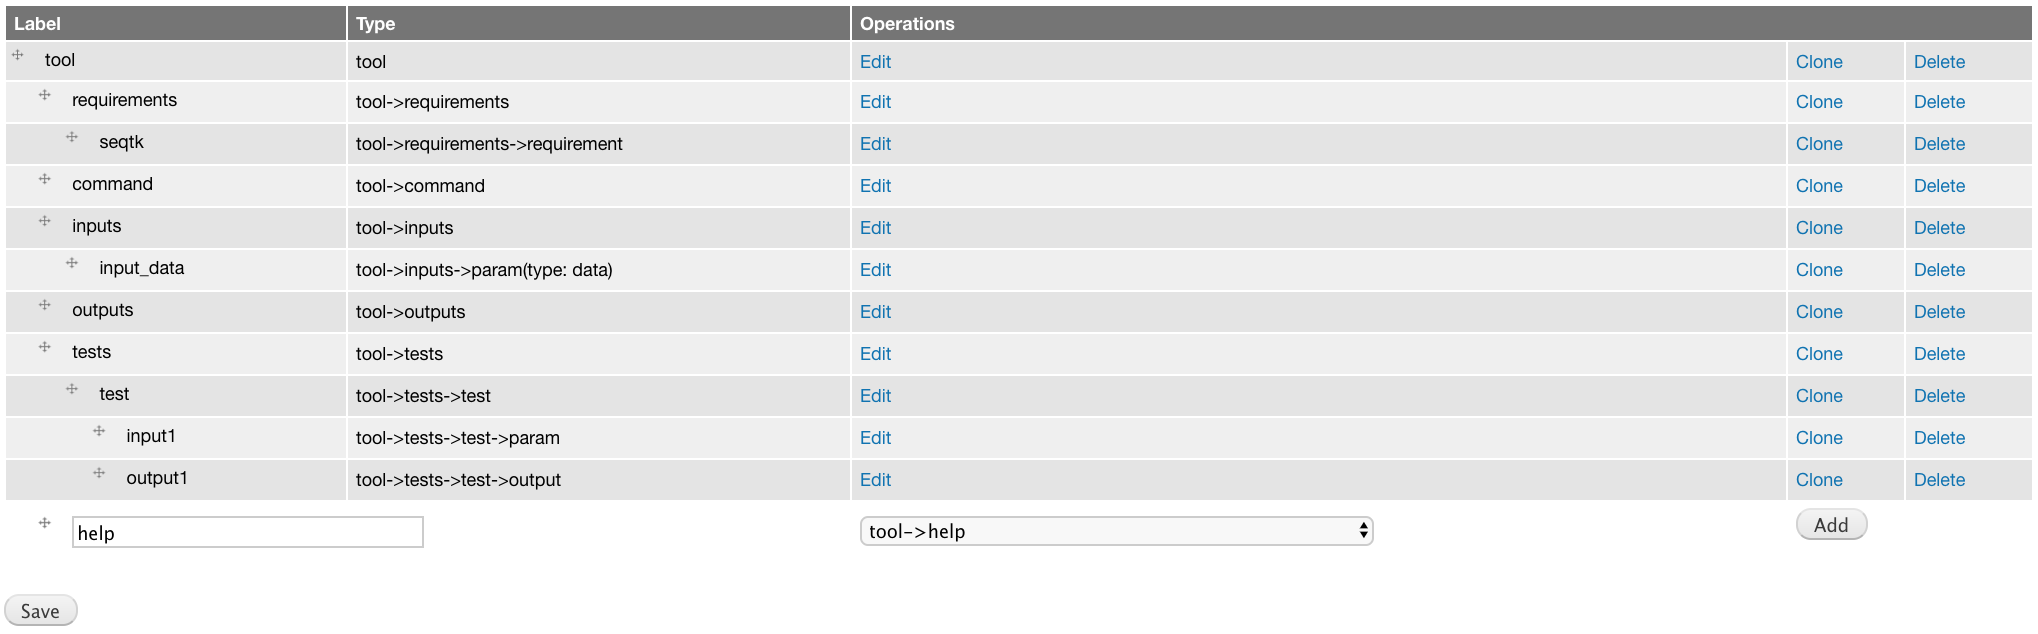
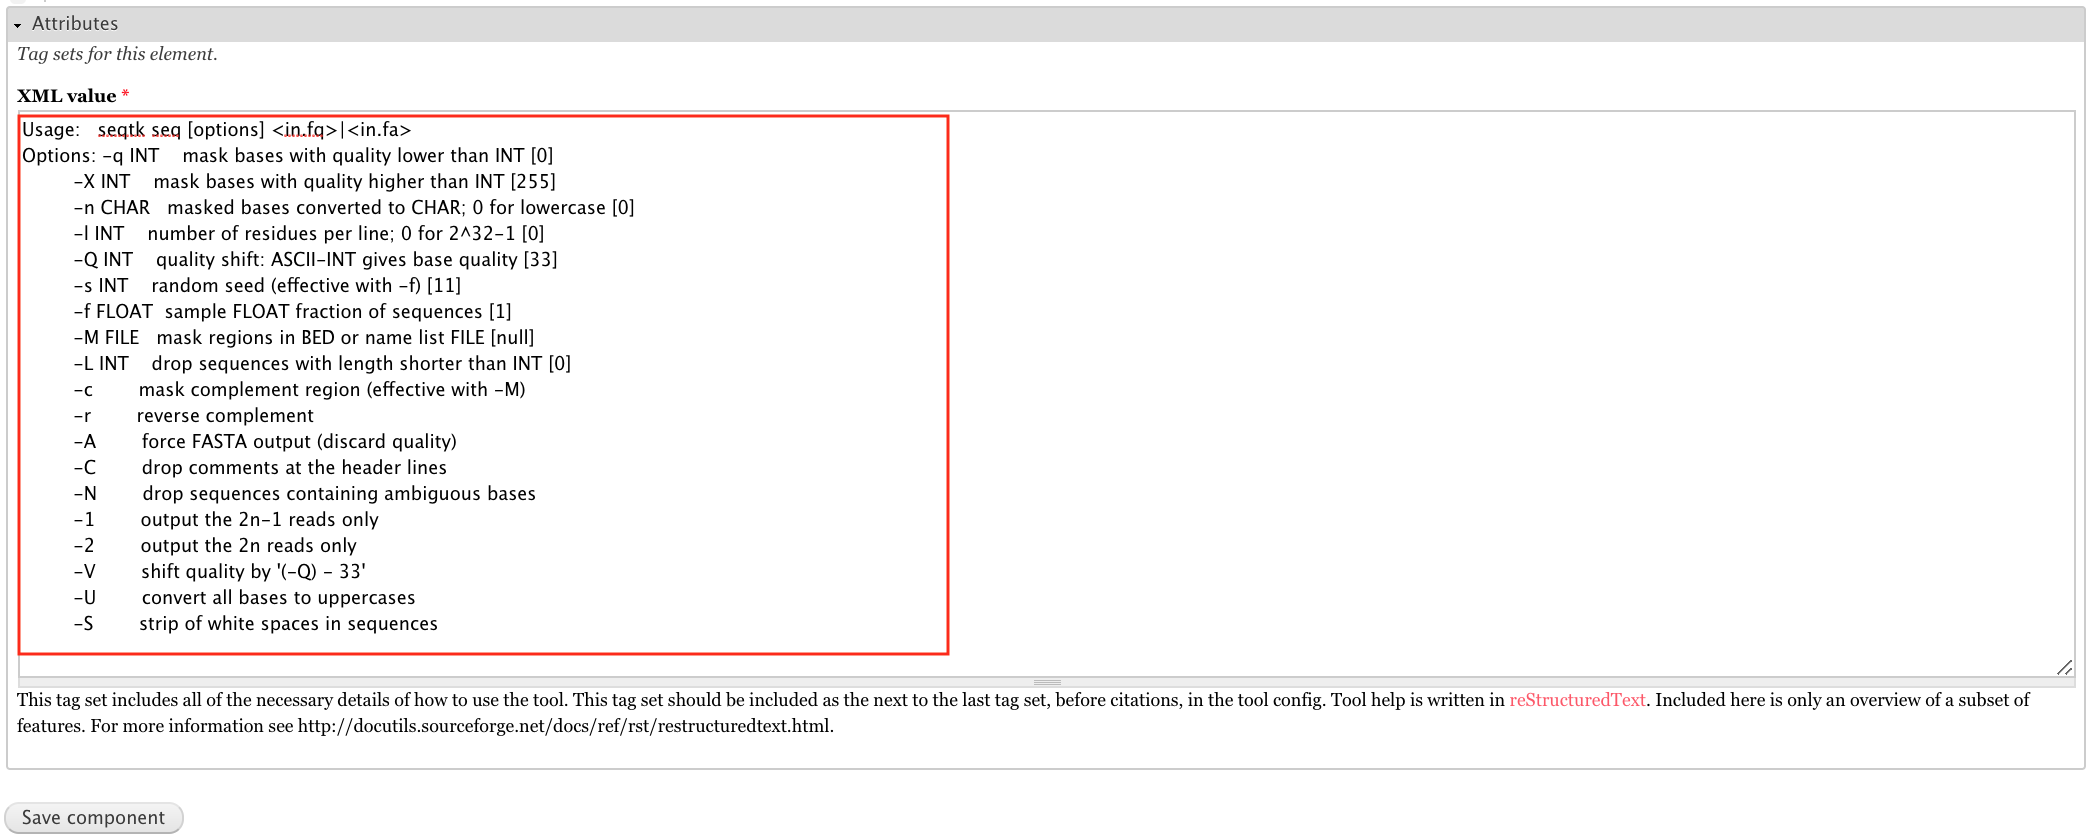
7. Create tool->help component
Next we’ll provide a help component, which looks like this:
<help><![CDATA[

Usage:   seqtk seq [options] <in.fq>|<in.fa>
Options: -q INT    mask bases with quality lower than INT [0]
         -X INT    mask bases with quality higher than INT [255]
         -n CHAR   masked bases converted to CHAR; 0 for lowercase [0]
         -l INT    number of residues per line; 0 for 2~32-1 [0]
         -Q INT    quality shift: ASCII-INT gives base quality [33]
         -s INT    random seed (effective with -f) [11]
         -f FLOAT  sample FLOAT fraction of sequences [1]
         -M FILE   mask regions in BED or name list FILE [null]
         -L INT    drop sequences with length shorter than INT [0]
         -c        mask complement region (effective with -M)
         -r        reverse complement
         -A        force FASTA output (discard quality)
         -C        drop comments at the header lines
         -N        drop sequences containing ambiguous bases
         -1        output the 2n-1 reads only
         -2        output the 2n reads only
         -V        shift quality by '(-Q) - 33'
         -U        convert all bases to uppercases
         -S        strip of white spaces in sequences
    ]]></help>
Add tool->help component labeled help.
For the attributes, paste the below text into the XML value field.
Usage:   seqtk seq [options] <in.fq>|<in.fa>
Options: -q INT    mask bases with quality lower than INT [0]
         -X INT    mask bases with quality higher than INT [255]
         -n CHAR   masked bases converted to CHAR; 0 for lowercase [0]
         -l INT    number of residues per line; 0 for 2~32-1 [0]
         -Q INT    quality shift: ASCII-INT gives base quality [33]
         -s INT    random seed (effective with -f) [11]
         -f FLOAT  sample FLOAT fraction of sequences [1]
         -M FILE   mask regions in BED or name list FILE [null]
         -L INT    drop sequences with length shorter than INT [0]
         -c        mask complement region (effective with -M)
         -r        reverse complement
         -A        force FASTA output (discard quality)
         -C        drop comments at the header lines
         -N        drop sequences containing ambiguous bases
         -1        output the 2n-1 reads only
         -2        output the 2n reads only
         -V        shift quality by '(-Q) - 33'
         -U        convert all bases to uppercases
         -S        strip of white spaces in sequences
8. Create tool->citations component
Finally, we will create a citation component.
<citations>
        <citation type="bibtex">
@misc{githubseqtk,
  author = {LastTODO, FirstTODO},
  year = {TODO},
  title = {seqtk},
  publisher = {GitHub},
  journal = {GitHub repository},
  url = {https://github.com/lh3/seqtk},
}</citation>
    </citations>
Add tool->citations component labeled citations.
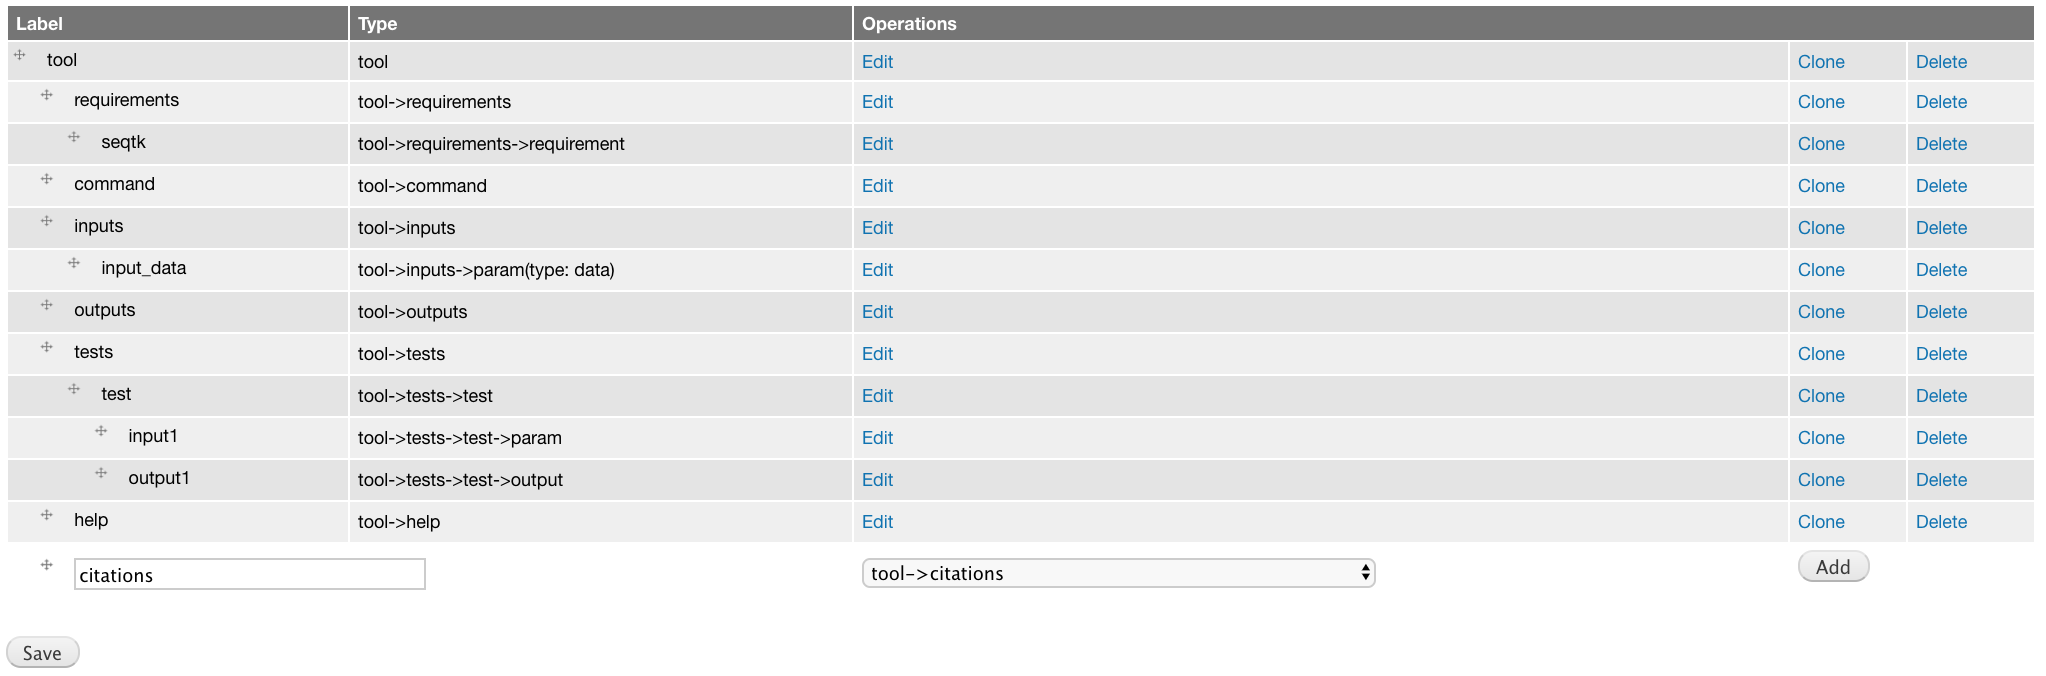
This component does not have attributes.

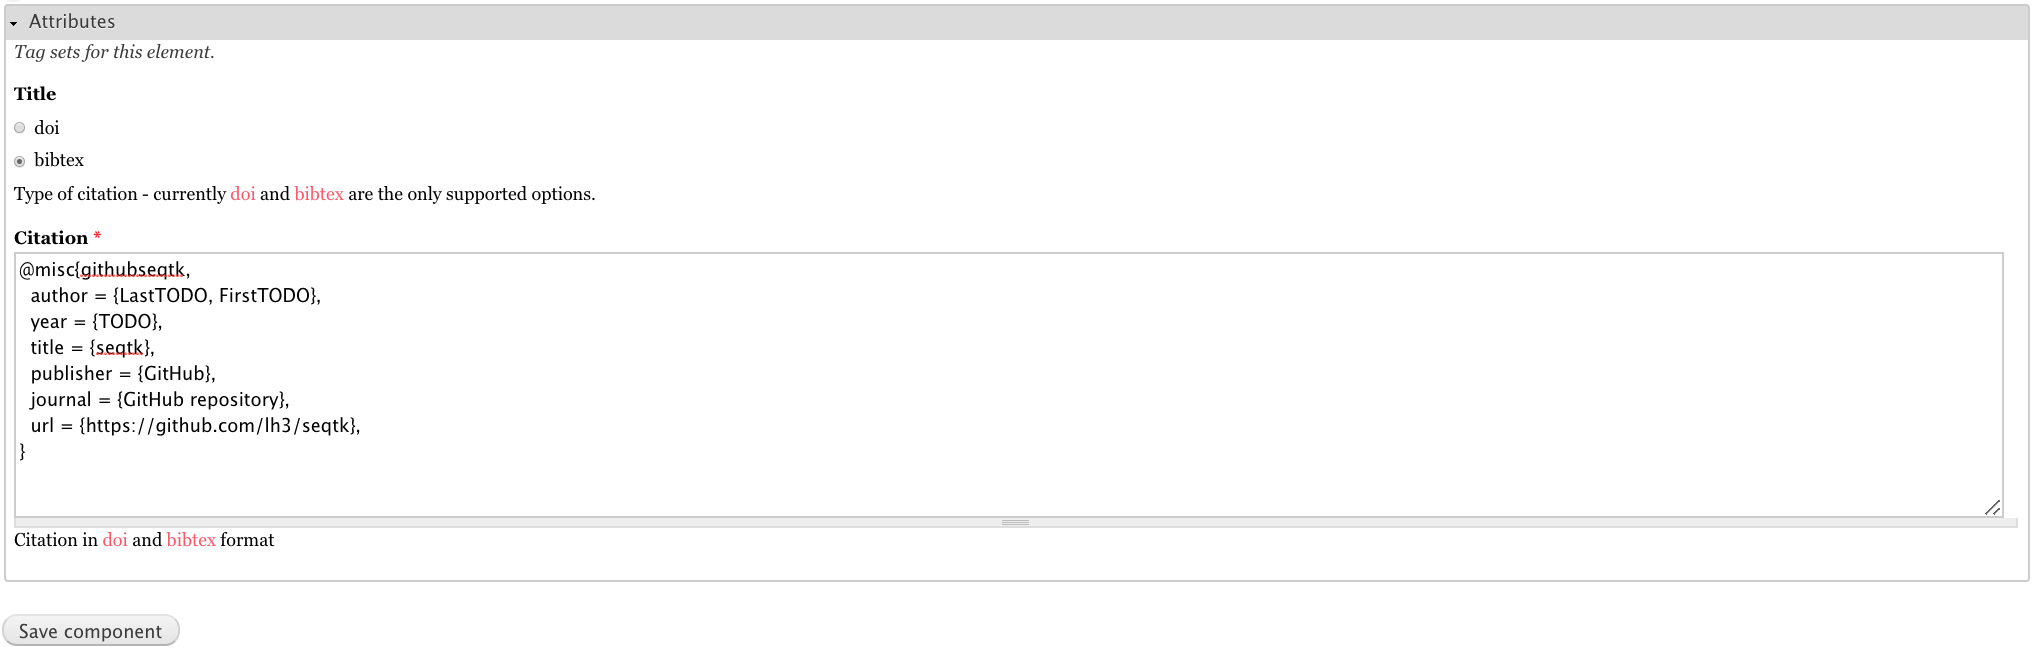
Add tool->citations->citation component labeled citation githubseqtk.
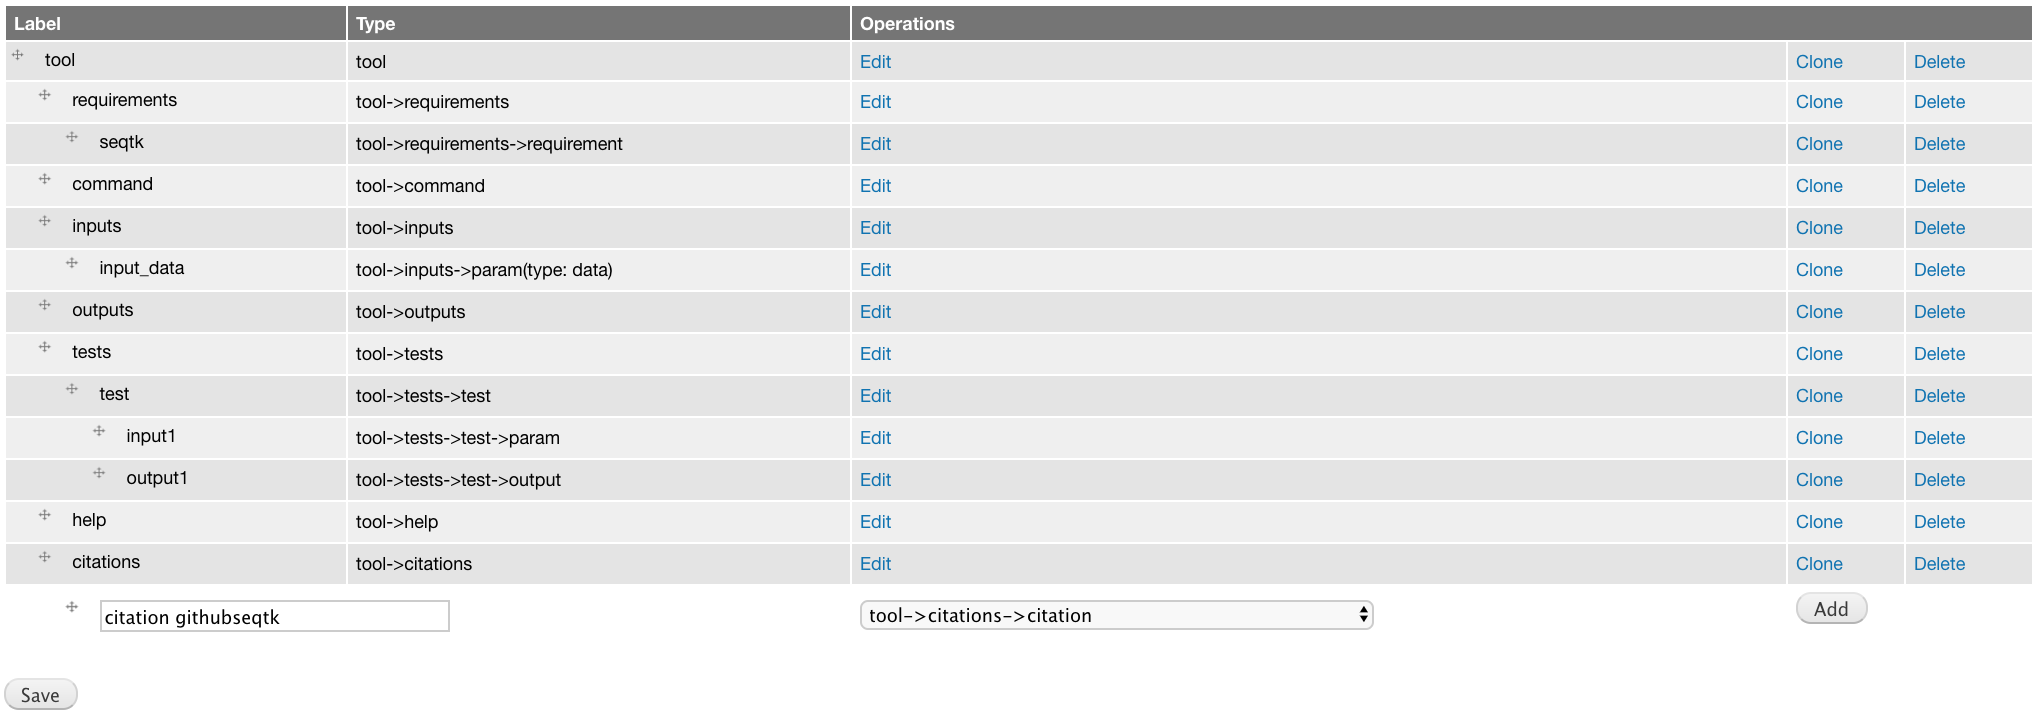
For the attributes, select bibtex for the Title, and paste the below citation in the Citation field.
@misc{githubseqtk,
  author = {LastTODO, FirstTODO},
  year = {TODO},
  title = {seqtk},
  publisher = {GitHub},
  journal = {GitHub repository},
  url = {https://github.com/lh3/seqtk},
}
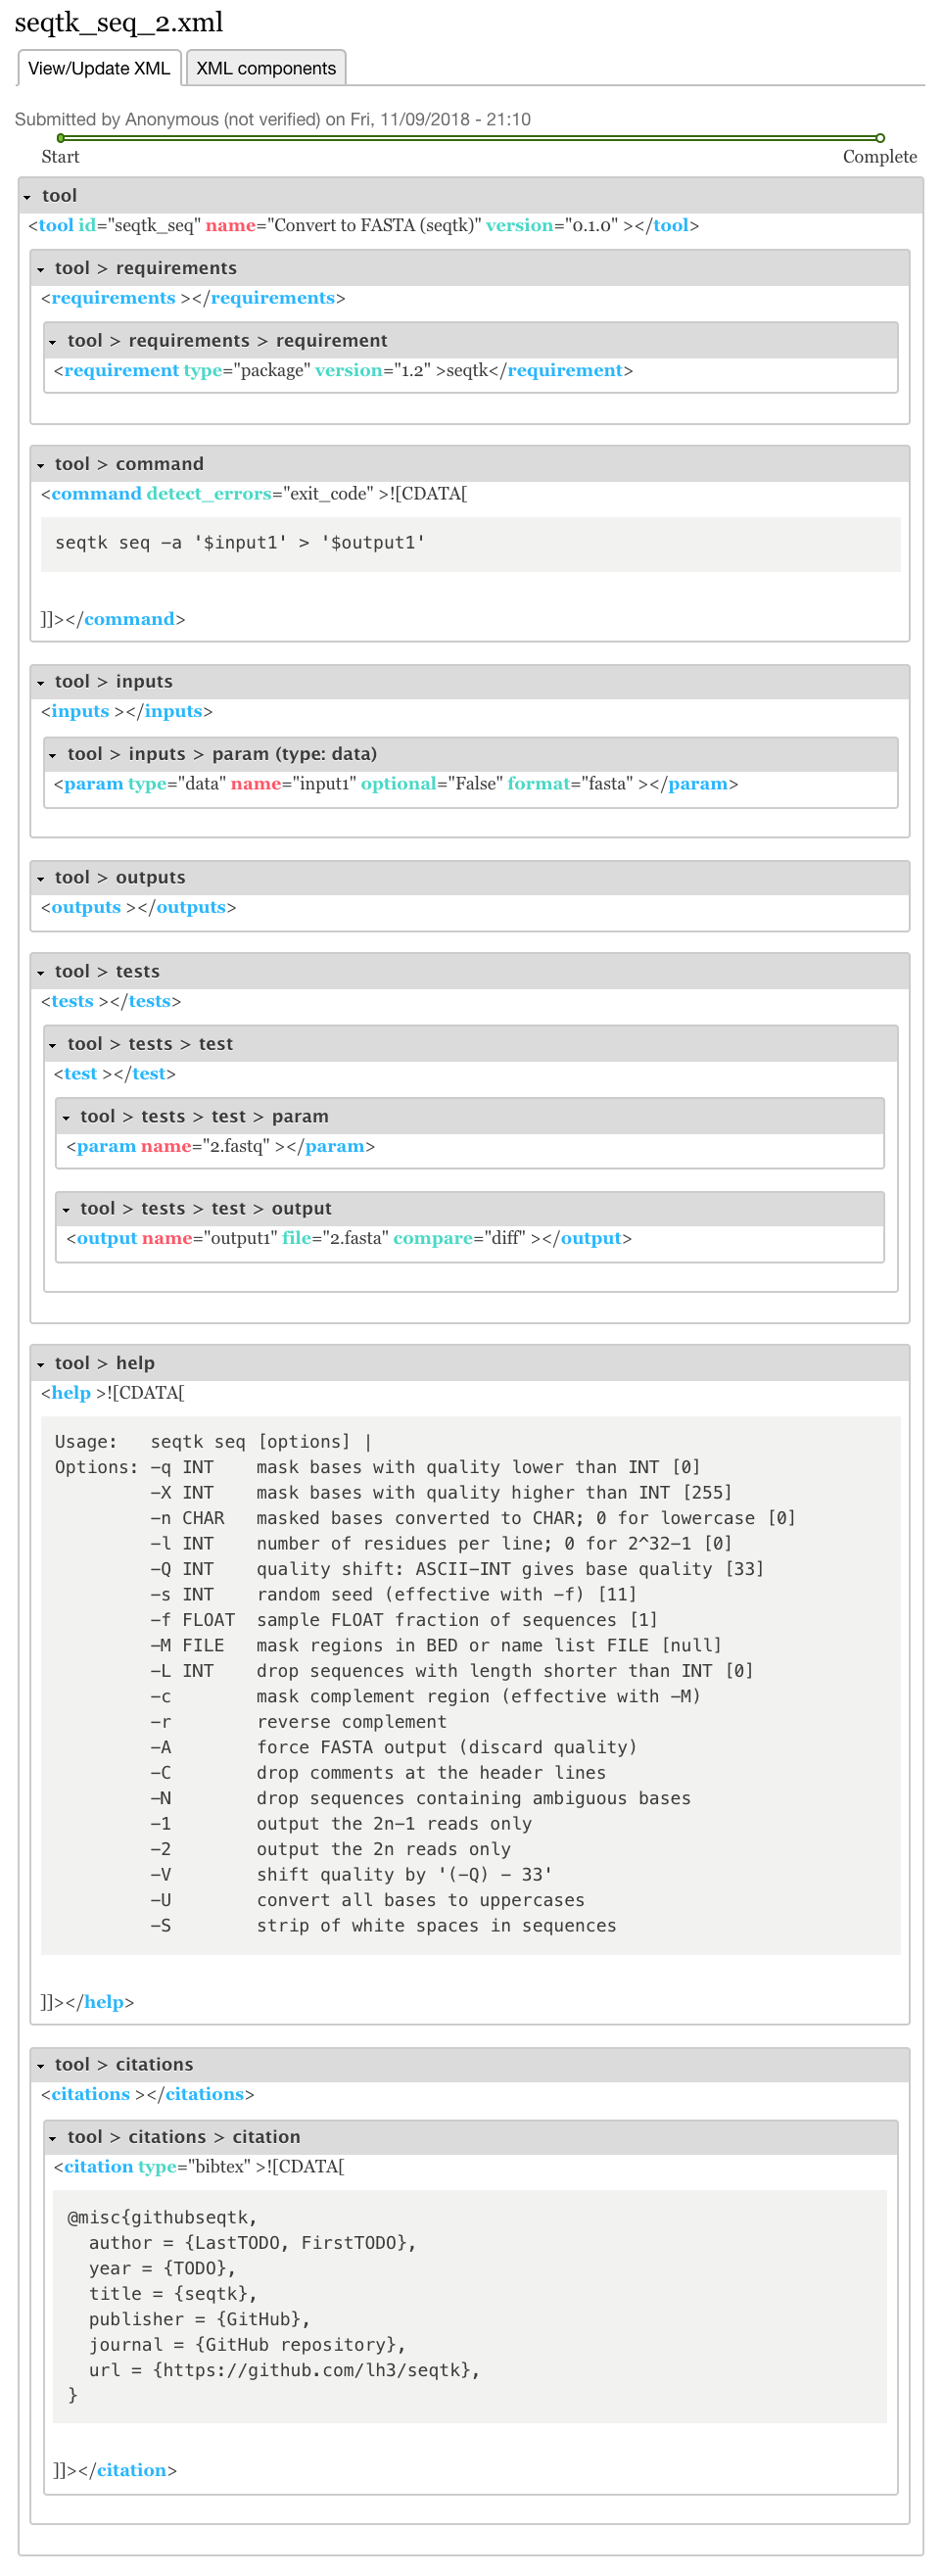
View the complete XML file
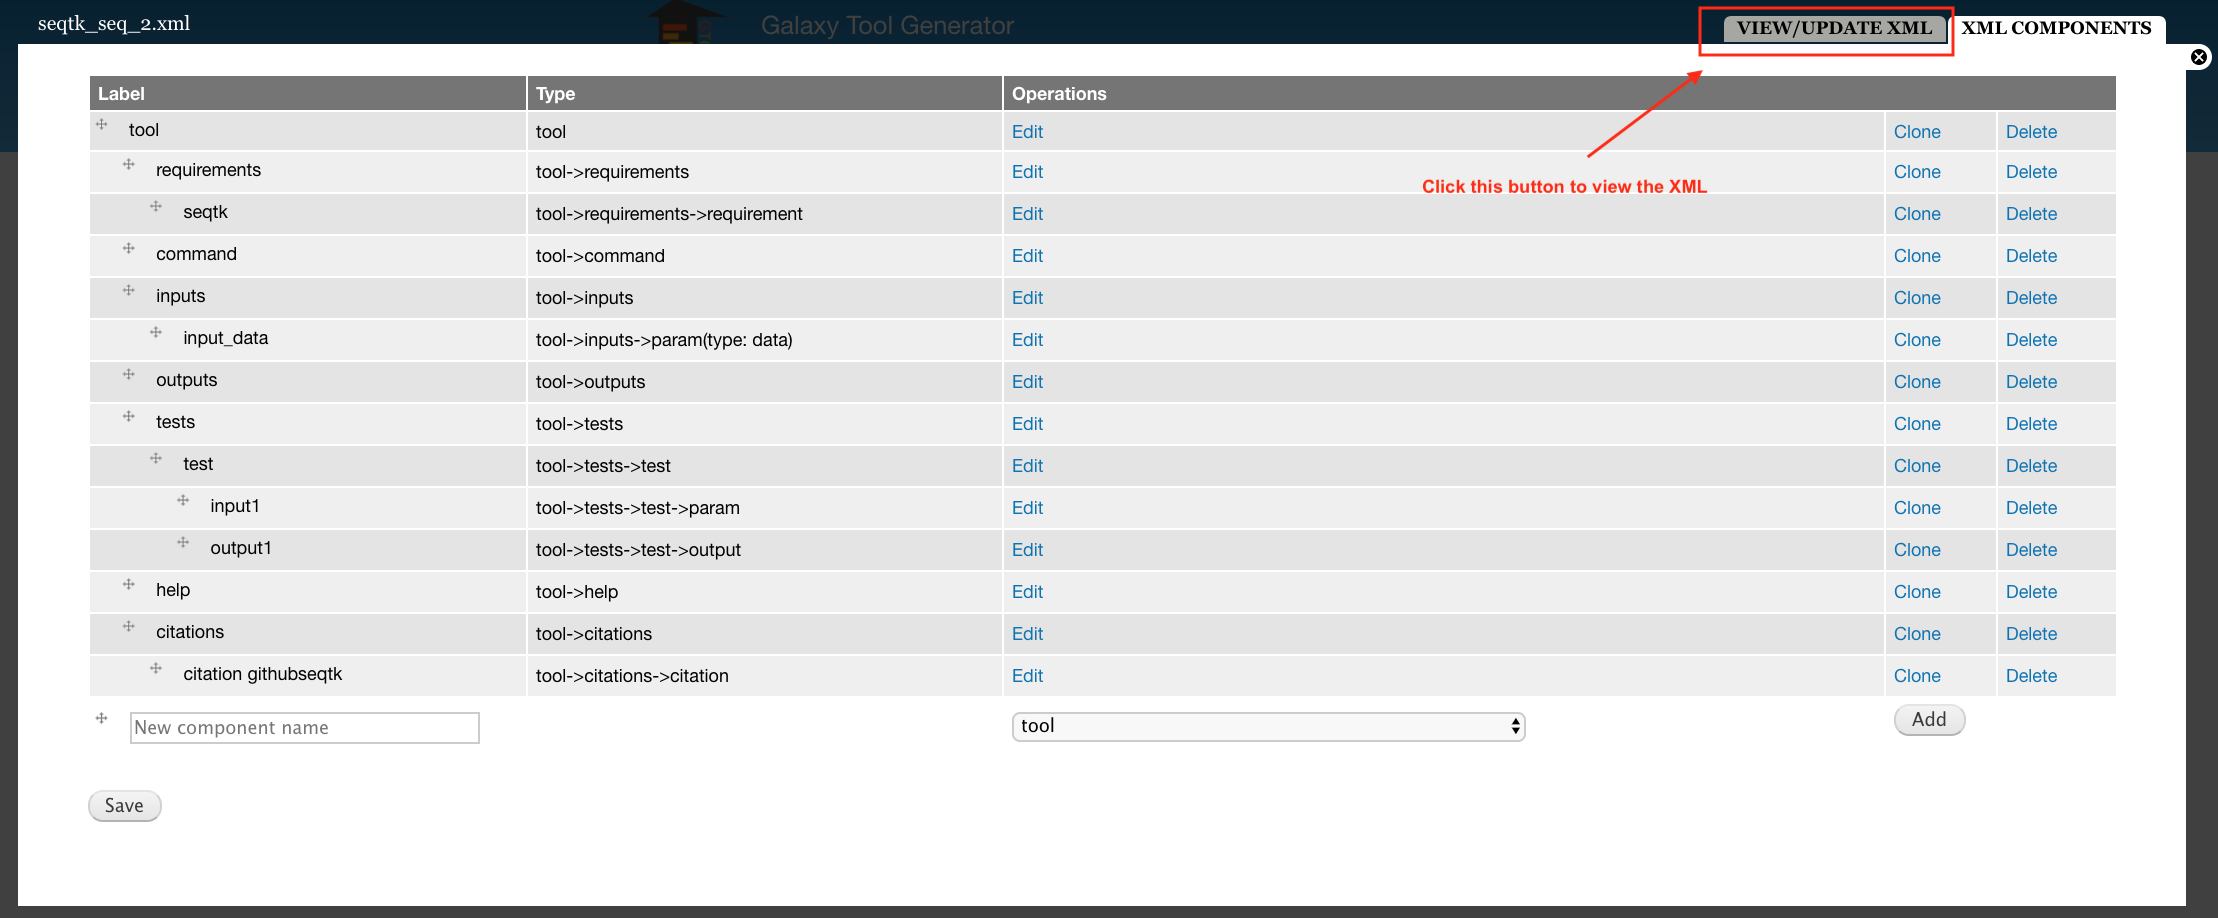
Now you have created all the components for building the seqtk_seq_2.xml file, you can view the XML page to see how it looks on GTG. Of course, you can view the XML page any time you want. It doesn’t have to be after you have added all the components.
To view the built XML, click the VIEW/UPDATE XML tab from the edit component page.
Note
You can also view the final XML from the Build Tools Repository page by clicking the view button.
Below is the XML page.